Enemies
|
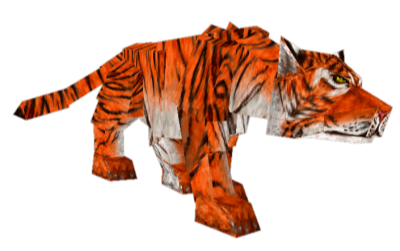
Tiger
The first enemy of the game. They act much like the tigers of Tomb Raider 2. Pistols and jumps will easily disperse this kitty. FIRST APPEARANCE: Jungle |
|
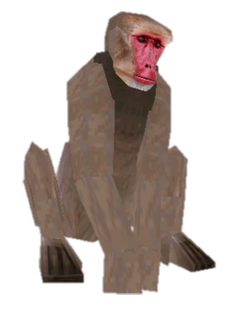
Monkey
Specifically a macaque. These little creatures are originally friendly in the level 'Jungle', even showing Lara to a lever, but in 'Temple Ruins', they scratch and claw, doing minimum damage. Interestingly, there are two monkeys in Temple Ruins that do not attack Lara. FIRST APPEARANCE: Jungle |
|
Piranha
These deadly fish will hone in on Lara if she so much as dips her foot into the water. There are times where you can still make it out of the water but if there isn't a ledge to climb out on, it is game over. They will drain Lara's health in an instant. FIRST APPEARANCE: Jungle |
|
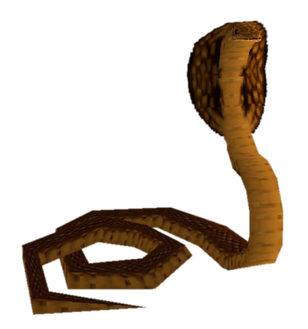
Cobra
Often hiding in bushes and greenery, when approached, their head will spring up and they will try to bite Lara but they are easy to defeat. Only, be careful, because they will poison Lara. FIRST APPEARANCE: Temple Ruins |
|
|
Shiva Statue
This enemy will start as a statue but when Lara approaches it, it will come to life. It attacks, using its weapons to slice Lara but will also defend itself, holding the scimitars up to block bullets. To get it to drop its guard, Lara will need to turn away and not aim at it. FIRST APPEARANCE: Temple Ruins |
|
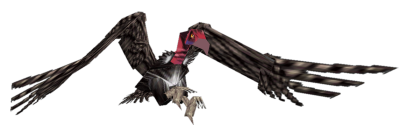
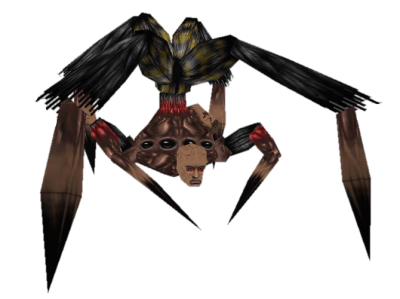
Vulture
Like many birds in the Tomb Raider series, they are hard to target, but once Lara gets a lock-on, it doesn't take much to take it down. FIRST APPEARANCE: River Ganges |

|
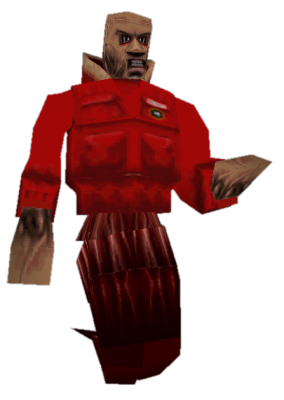
Tony
Lara actually first meets Tony at the end of 'Jungle' but doesn't fully take him on until the 'Caves of Kaliya'. He was employed by Dr. Willard, along with Randy and Rory, with the task of searching the jungles of India for a piece of a meteorite artefact. When Lara spoke to him, he seemed dazzled, hearing voices. He tells Lara that Randy and Rory went against his advice and went off to explore the Temple Ruins but are now presumed dead under a mudslide. He was planning on leaving the area, however Lara sees him again at the end of 'Temple Ruins' with the Infada Stone embedded in his chest. Lara gives chase along the River Ganges and confronts him in the 'Caves of Kaliya'. His attacks are relatively easy to avoid if you run around the room in a circular pattern. FIRST APPEARANCE: Caves of Kaliya |
|
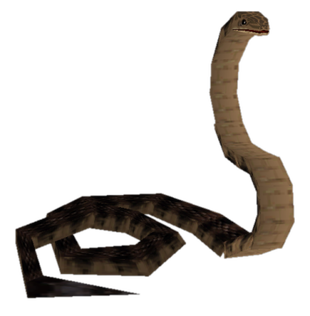
Rattlesnake
True to its name, you'll hear this snake's tail rattle, which is helpful because it likes to hide in bushes. A few shots with the pistols will kill it. FIRST APPEARANCE: Nevada |

|
Desert Thug
We're not sure what these folks are up to ("working") but their only weapon against Lara is their fists. Keep back and take them out. FIRST APPEARANCE: Nevada |
TIDBIT: On the back of their denim cutoff is the image of a flaming skull on the back. This is a reference to id Software's game 'Doom' from 1993. The symbol is the image of a Lost Soul.

|

|
Military Police
Highly trained men, these guards are trying to stop anyone from entering the highly secretive locations of America - and stop anyone from leaving. One uses a baton, meaning that you want to stay back from him; the other carries a handgun. Use the prisoners to help take care of these guards in the level 'High Security Compound'. FIRST APPEARANCE: High Security Compound |
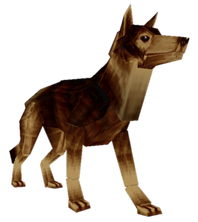
German Shepherd. FOUND: High Security Compound
|
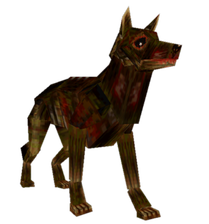
FOUND: Aldwych
|
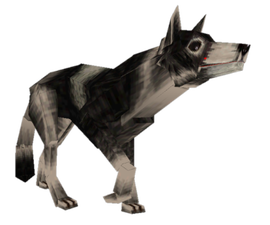
Husky. FOUND: Antarctica
|
Dog
An easy foe to fight against. Either keep your distance with a strong gun or keep jumping over them. For an interesting fact, the Aldwych dog is only one of two enemies in the bonus level 'All Hallows'. |

|
Military Police Sniper
A dangerous enemy; hopefully you've found the Desert Eagle! FIRST APPEARANCE: Area 51 |
|
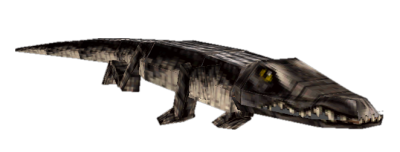
Crocodile
Try and take out this enemy when standing on land, however usually it is better to just swim past crocodiles. When you first see a croc will depend on which location you go to first. FIRST APPEARANCE: Coastal Village / Lud's Gate |
|
|
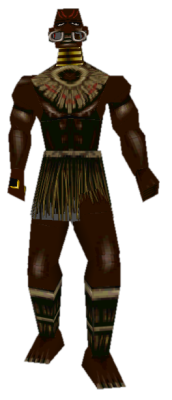
Tribesmen
The tribesman with the handheld weapon isn't too much of a bother but the one with the blowpipe can be. It only takes one shot to be poisoned by him and he can be very good at hitting his target. Get out your strongest weapon and hope for the best. FIRST APPEARANCE: Coastal Village |
|
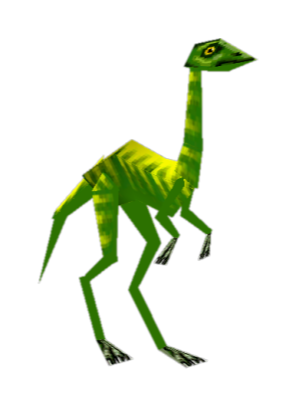
Compsognathus
These will hunt in groups, so whilst it doesn't take much to kill a lone Compsognathus, a small group may need some dodging, but these are nothing compared to what's to come... FIRST APPEARANCE: Crash Site |
|
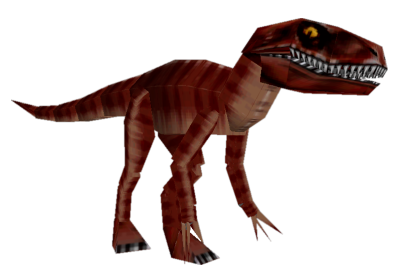
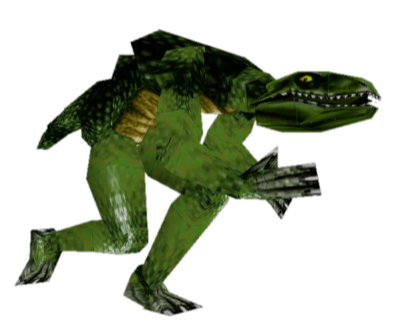
Velociraptor
A familiar foe. Doesn't take much from the shotgun or MP5 to kill them. FIRST APPEARANCE: Crash Site |
TIDBIT: If you keep some of these alive in the area with the T-Rex, these will actually try and fight the T-Rex for you.
|
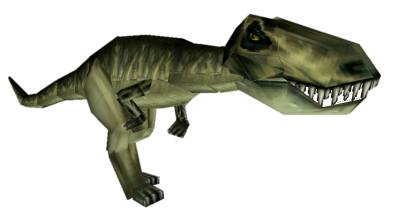
T-Rex
An even more familiar foe. Do you really need us to tell you how to deal with him? FIRST APPEARANCE: Crash Site |
TIDBIT: You can actually use flares to distract the T-Rex whilst you pull levers!
|
Lizard
We are not sure what these truly are; perhaps they too have mutated due to the meteorite artefact. Be very careful around them as they spew poison at Lara, poisoning her. FIRST APPEARANCE: Madubu Gorge |
|
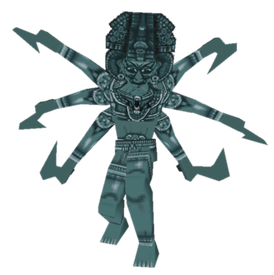
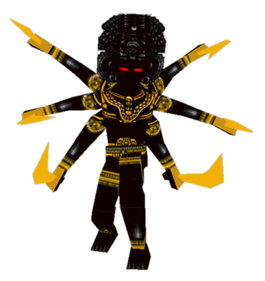
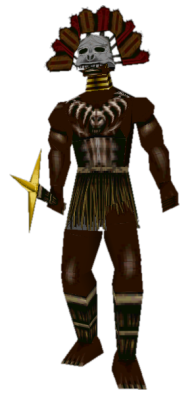
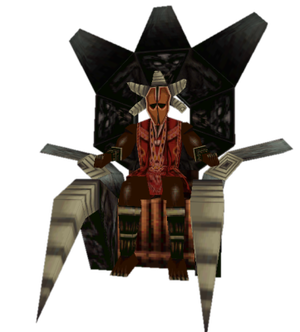
Puna Boss
It's quite possible that this is Mauki, the Polynesian ruler that was mentioned by the chanting tribesman at the end of Madubu Gorge. The only thing you can do is shoot this enemy, watching out for his lightning strike attacks and the lizards that he spawns. His only defence is a bulletproof shield, which is temporary. FIRST APPEARANCE: Temple of Puna |
|
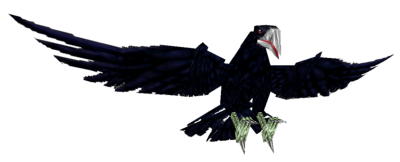
Crow
Again, you'll hear these enemies first before you see them. They don't take much to kill but they can be a nuisance if they get too close. FIRST APPEARANCE: Thames Wharf |

|
London Mercenary
Armed with a SMG, these guys can really do some damage if they get a good aim on Lara. Like many of the armed enemies in this game, in their dying state, they will try and take one last snipe at Lara. Avoid this by standing behind them. FIRST APPEARANCE: Thames Wharf |

|
London Guard
Aw now this guy was only doing his job. Sadly for him, he stands in the way of Lara and her mission. Use a Desert Eagle if you can and take them out. Watch out for that final shot from them. This guard is one of only two enemies to appear in the bonus level 'All Hallows'. FIRST APPEARANCE: Thames Wharf |
|
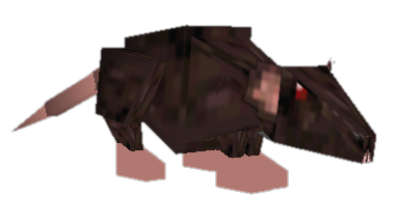
Rat
An easy enemy to waste. Pistols will do fine - anything more is just cruel. FIRST APPEARANCE: Thames Wharf |
|
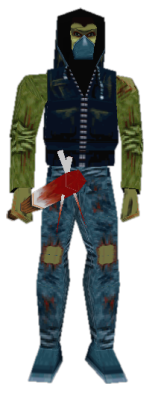
The Damned
These guys were actually enemies first. Their only attack is to beat Lara, which judging by the look of their weapon, would be painful. FIRST APPEARANCE: Aldwych |
|
Scuba Diver
Now we've met guys like these before. At this point of the game, you can either use your harpoon gun or the weapon on the UPU (Underwater Propulsion Unit), which in turn uses your harpoon supply. Best tactic would be to kill them whilst being stood out on land. FIRST APPEARANCE: Lud's Gate |

|
Sophia Leigh
According to one of her mercs, Sophia is decades old, which could be put down to the power of the meteorite artefact that she has in her sceptre. She currently runs a cosmetics business whilst running a secret project looking for the secret to immortality, using people as test subjects for her experiments. Her attacks can be lethal; the charged attacks will drain a good chunk of Lara's health if Lara gets hit by the full blast. The smaller attacks will nip away at Lara more quickly. Hurry in your movement and use the environment to dodge and time jumps. FIRST APPEARANCE: City |

|
RX-Tech Researcher
Sometimes paired with a dog. This researcher is also paid to protect Dr Willard's secrets. Armed with a handgun, he isn't as dangerous as those armed with a SMG, but either take him out with a powerful gun or jump over him to try and prevent him from aiming at Lara. FIRST APPEARANCE: Antarctica |
|
Crawling Mutated Scientist
Now Dr. Willard says that these scientists are evolving at a natural acceleration, but these ground crawling mutants will spew up poisonous fluid at Lara if she gets near. She is doing the kindest thing by using a powerful weapon, say an MP5 or a Desert Eagle and putting them out of their misery. One of these actually appear in the previous level, 'Antarctica' however it doesn't move or attack, per-say; they just spew poison if Lara gets close enough - merely a sign of things to come. FIRST APPEARANCE: RX-Tech Mines |
|
Upright Mutated Scientist
To make your life easier, use the Desert Eagle here. It'll take 5 shots with this weapon, so hopefully you've been collecting and saving ammo. FIRST APPEARANCE: RX-Tech Mines |
|
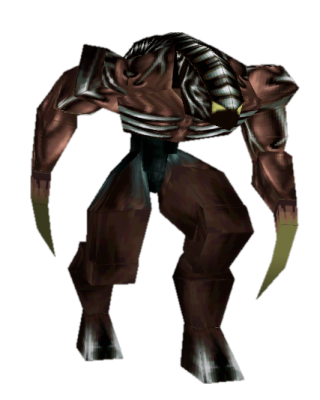
Mutant
Of course those mutated scientists were not yet done evolving. These take five or six shots with the Desert Eagle and will explode on death. They will charge at Lara and try to stab her but the long tail upon their head rears up and shoots electrical charges at her. FIRST APPEARANCE: Lost City of Tinnos |
|
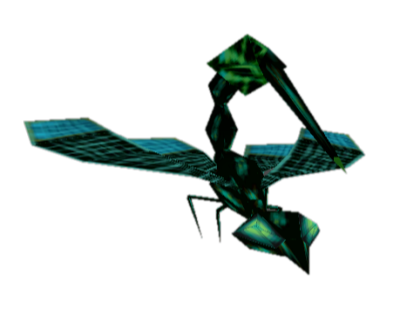
Wasp
Surprisingly, these aren't too bad to kill if you want to use your pistols, just keep some distance between them and Lara. Their stings only take a small amount of health from Lara but you'll want to kill them before trying to climb things. FIRST APPEARANCE: Lost City of Tinnos |
|
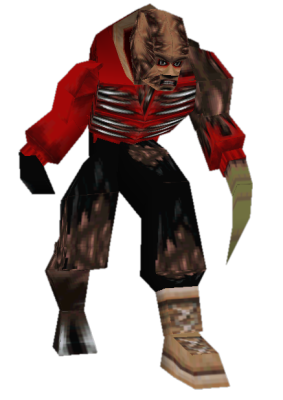
Willard Transformed
This was once Dr. Willard before he donated himself for experimenting, dropping himself into the meteorite's crater. It covers quite a bit of distance and will jump and turn 180 degrees to change direction. Just one charged attack from this creature will kill Lara instantly. Luckily it has one weakness: it is stunned after a certain amount of gunfire, leaving Lara enough time to sprint down to the artefact, pick it up and return to battle. FIRST APPEARANCE: Meteorite Cavern |
|
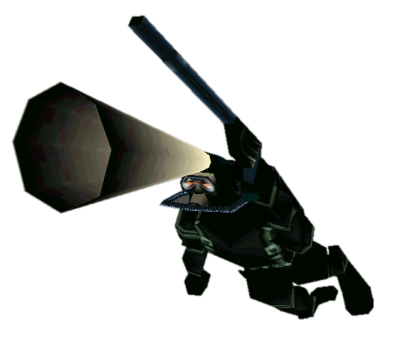
RX-Tech Flamethrower
Sadly they turn on you. Originally a friendly in 'RX-Tech Mines', helping to take out any mutants, they decide to then try and kill Lara after she kills their employer. Use a powerful weapon, like the desert eagle or keep your distance and use a long range weapon. FIRST APPEARANCE: Meteorite Cavern |

|
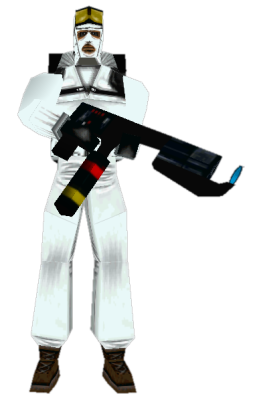
RX-Tech Rifleman
Dressed for the cold weather, this guy will not hesitate in trying to stop Lara from leaving with the artefacts. Not to be confused with the flamethrower mercenary, this one uses a silenced SMG. FIRST APPEARANCE: Meteorite Cavern |