Multiplayer
For the second time in the Tomb Raider franchise, a multiplayer mode was included in Tomb Raider (2013). It was developed by Eidos Montreal. There are trophies and achievements for completing certain feats in gameplay.
Maps:
Free Maps Available From the Start:
DLC Maps:
- Shanty Town - The island of Yamatai contains a wide variety of environments. Most were formed naturally; many others were built long ago. However the Shanty Town is one of the relatively newer areas, having been cobbled together by the Scavengers using scrap and other debris found on the island.
- Chasm - Wind has wiped most of this once-picturesque outpost clean. The sands have stripped off paint off anything and everything. All that remains are the wooden skeletons of the previously grand buildings and towers. At the north end of this map there is a large bell. There is a crank that will ring a bell and summon a blinding windstorm.
- Monastery - The monastery is in a quiet and desolate place at the top of a mountain. Its nearly monochromatic palette conjures a feeling of peace and calm, but don’t be fooled. Earthquakes have weakened the foundations of the natural rock formations of this area, and the Solarii has rigged them all. Any damage to these weak points and the bridges will start to collapse. Be careful of falling debris, it is deadly.
- Shrine - Quiet and cold, the shrine is in excellent condition despite its age. While most of the island has already been overrun and destroyed by the Solarii this place is deserted, aside from a few lanterns that cast a golden hue over the structures.
- Beach - Near the rocky shore of the island there is a clearing - a dangerous and open place full of twists and turns. It boasts the most verticality of any of the maps and a brutal lightning storm. The lighting will hit the area randomly and spread fires. Also, there are lighting rods scattered throughout the map and once activated they will kill any enemy who wanders by with a bolt from the sky.
- Underground - When the Japanese surrendered at the end of the Second World War, three of their four nuclear submarines were destroyed by the Allies. A I-403 Submarine, the forth, was never found, hidden in an underground base on the island. The submarine holds another deadly secret: when the base was abandoned the officers initiated a self-destruct sequence on the submarine but, due do a power disruption, the final countdown was never started. During the match in this tight and tense level, the power will be returned to the sub and a doorway will open. The first team to activate the self-destruct will set the match time to 2:00—who will win?
DLC Maps:
- Caves & Cliffs Multiplayer Map Pack - This map pack was originally an Xbox 360 exclusive, but in mid April, it became available to PlayStation 3 and PC players.
- Scavenger Caverns - A massive network of caves used by the scavengers as a prison area.
- Cliff Shantytown - This settlement was built high in the island cliffs. Its many layers hide some of the deadliest traps on the island.
- The Burning Village - A fire has erupted in an abandoned Japanese village. The burning buildings offer multiple ways to escape your enemies, but enter them at your own peril.
- 1939 Multiplayer Map Pack
- Dogfight - Dating back to the World War II experiments conducted on the island, this bunker is a deadly maze of brick and mortar that could easily become a tomb.
- Forest Meadow - This forest meadow is a hunting ground, filled with open spaces that can be advantageous and dangerous at the same time. Who is the hunter and who is the hunted?
- Shipwrecked Multiplayer Map Pack
- Lost Fleet - A massive beached ship serves as a dangerous battleground filled with twists, turns, and traps.
- Himiko's Cradle - Danger lurks around every corner in this mountain top shrine. The area is sacred to the scavengers and will be your final resting place if you are not careful.
Characters:
The player has the choice to play as either the 'Surviviors' (members the Endurance crew) or the 'Solarii' (which also include the Oni).
|
Survivors:
|
Solarii:
|
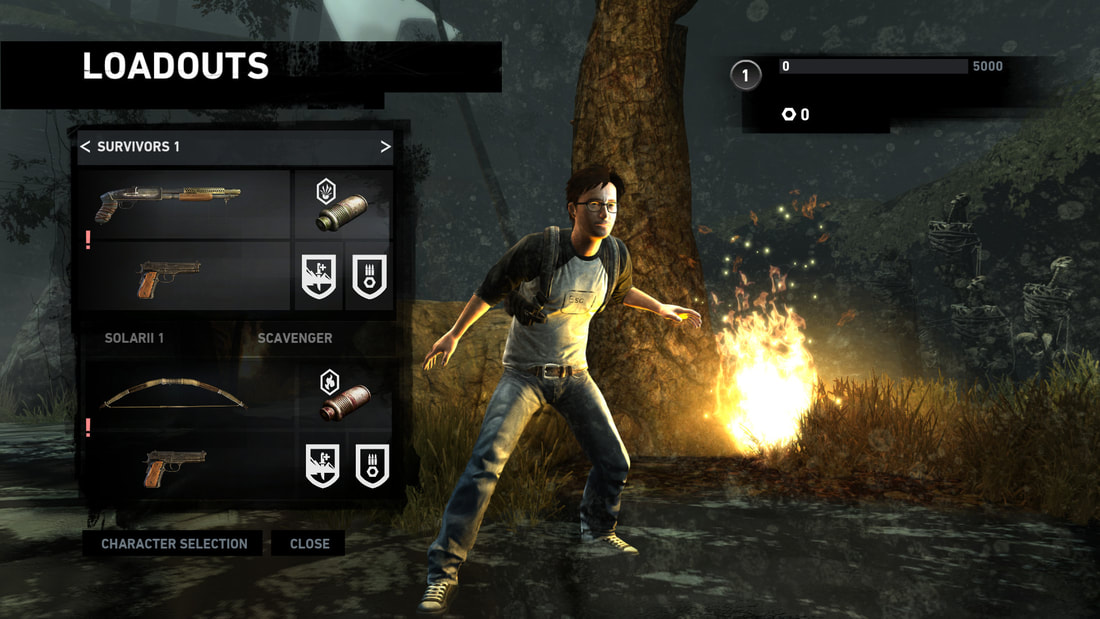
Loadouts:
|
A loadout for any faction consists of a Primary Weapon, a Secondary Weapon, an Explosive weapon, an Offensive Skill and an Survival Skill. The player can set 2 presets for each faction and there are different weapons and explosives depending on the faction that you pick however the skills are the same for both factions.
|
|
Survivors - Primary Weapons
Combat Shotgun
The bulkier combat shotgun trades some finesse for an increased shell capacity, and improved accuracy.
Projectile Upgrades: Rapid Fire, Frag Rounds and Damage Attachments Upgrades: Narrow Choke, Extended Clip and Reload Time Available at level: 5 |
Commando Rifle
A modified assault rifle that sacrifices some stopping power for more accuracy and effective range.
Projectile Upgrades: Rapid Fire, Stability and Damage Attachments Upgrades: Enhanced Zoom, Extended Clip and Reload Time. Available at Level: 22 |
Fully Automatic Shotgun
A fully automatic shotgun, excellent for clearing rooms in a hurry.
Projectile Upgrades: Rapid Fire, Frag Rounds and Damage Attachments Upgrades: Narrow Choke, Extended Clip and Reload Time Available at level: 29 |
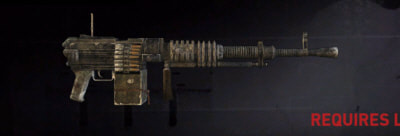
Light Machine Gun
A belt-fed bullet hose; what it lacks in subtlety it more than makes up for in quantity.
Projectile Upgrades: Rapid Fire, Damage, Stability Attachment Upgrades: Enhanced Zoom, Extended Clip, Reload Time Available at level: 41 |
Modified Submachine Gun
A jury-rigged submachine gun that boasts improved handling thanks to a heavily modified receiver.
Projectile Upgrades: Rapid Fire, Damage, Stability Attachment Upgrades: Enhanced Zoom, Extended Clip, Reload Time Available at level: 9 |
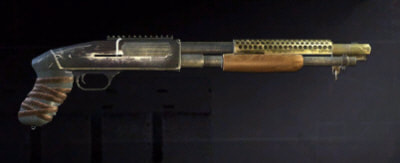
Pump-Action Shotgun
A well-rounded, modern shotgun, designed to be effective in any close range engagement.
Projectile Upgrades: Rapid Fire, Frag Rounds, Damage Attachment Upgrades: Narrow Choke, Extended Clip, Reload Time Available at level: 1 |
Submachine Gun
A well-rounded, balanced, and capable weapon in all combat situations.
Projectile Upgrades: Rapid Fire, Damage, Stability Attachment Upgrades: Enhanced Zoom, Extended Clip, Reload Time Available at level: 1 |

Survivor Recurve Bow
Stiffer materials allow this bow to be drawn quickly, but increased tension makes it difficult to hold a shot.
Projectile Upgrades: Rapid Fire, Recurve Bow Napalm and Damage Attachment Upgrades: Enhanced Zoom, Draw Time and Hold Time Available at level: 13 |
Survivors - Secondary Weapons

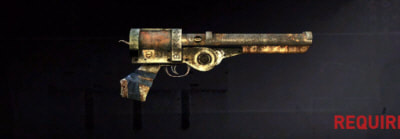
Fully Automatic Pistol
A fully automatic pistol cobbled together from spare parts.
Projectile Upgrades: Rapid Fire, Damage Attachment Upgrades: Reload Time, Stability, Extended Clip Available at level: 19 |
Sawed-Off Shotgun
A small, compact, sawed-off shotgun. Packs a lot of punch, but has a very short effective range.
Projectile Upgrades: Rapid Fire, Frag Rounds, Damage Attachment Upgrades: Narrow Choke, Extended Clip, Reload Time Available at level: 54 |
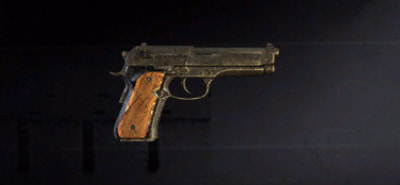
Semi-Auto Pistol
A well-rounded pistol with average stopping power.
Projectile Upgrades: Rapid Fire, Damage, Burst Fire Attachment Upgrades: Reload Time, Stability, Extended Clip Available at level: 1 |

Tactical Pistol
A modern pistol with a quick and responsive rate of fire, but not much stopping power.
Projectile Upgrades: Rapid Fire, Burst Fire and Damage Attachments Upgrades: Stability, Extended Clip and Reload Time Available at level: 3 |
Survivors - Explosives

Dynamite
A pack of dynamite with remote detonator. Can be detonated by pressing [M Mouse] after it's been placed.
Available at level: 37 |

Frag Grenade
Fragmentation grenades explode into a shower of deadly shrapnel.
Available at level: 1 |

Land Mine
A powerful, pressure-triggered explosive device.
Available at level: 15 |

Smoke Grenade
Smoke grenades obscure vision, while also highlighting enemies inside the area of effect.
Available at level: 25 |
Solarii - Primary Weapons

Assault Rifle
A powerful and accurate rifle with great range, but low rate of fire.
Projectile Upgrades: Rapid Fire, Stability and Damage Attachments Upgrades: Enhanced Zoom, Extended Clip and Reload Time Available at level: 1 |

Compound Bow
A modern bow design that strikes a good balance between draw and hold time.
Projectile Upgrades: Rapid Fire, Compound Bow Napalm and Damage Attachments Upgrades: Enhanced Zoom, Draw Time and Hold Time Available at level: 58 |
Crossbow
A devastatingly accurate and deadly weapon despite the bolt mechanism's inherently slow rate of fire.
Projectile Upgrades: Crossbow Napalm and Damage Attachment Upgrades: Enhanced Zoom and Reload Time Available at level: 23 |
Double-Barreled Shotgun
A custom shotgun with extended barrels and a higher muzzle velocity, ensuring greater accuracy at range.
Projectile Upgrades: Rapid Fire, Frag Rounds and Damage Attachments Upgrades: Narrow Choke, Extended Clip and Reload Time Available at level: 42 |

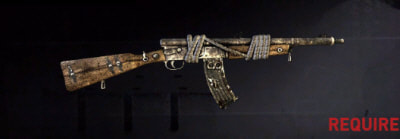
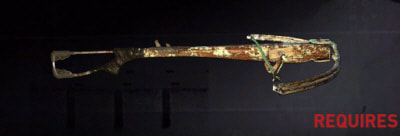
Makeshift Longbow
A primitive bow design made from flexible materials, allowing for a long draw and hold time.
Projectile Upgrades: Rapid Fire, Damage, Longbow Napalm Attachment Upgrades: Enhanced Zoom, Draw Time, Hold Time Available at level: 1 |
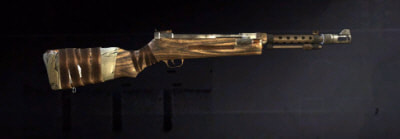
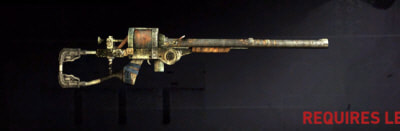
Marksman Rifle
A semi-automatic rifle designed for medium-to-long range engagements.
Projectile Upgrades: Rapid Fire, Longbow Napalm, Damage Attachment Upgrades: Enhanced Zoom, Draw Time, Hold Time Available at level: 1 |

Solarii Recurve Bow
Stiffer materials allow this bow to be drawn quickly, but increased tension makes it difficult to hold a shot.
Projectile Upgrades: Rapid Fire, Recurve Bow Napalm and Damage Attachment Upgrades: Enhanced Zoom, Draw Time and Hold Time Available at level: 7 |
Trench Shotgun
An old standard-issue, pump-action shotgun. Powerful, but stopping power suffers considerably at range.
Projectile upgrades: Rapid Fire, Frag Rounds and Damage Attachments Upgrades: Narrow Choke, Extended Clip and Reload Time Available at level: 14 |
Solarii - Secondary Weapons
Magnum Pistol
A .50 calibre magnum pistol. Heavy, with a lot of stopping power, but has a slow rate of fire.
Projectile Upgrades: Rapid Fire, Burst Fire and Damage Attachments Upgrades: Stability, Extended Clip and Reload Time. Available at level: 20 |
Semi-Auto Pistol
A well-rounded pistol with average stopping power.
Projectile Upgrades: Rapid Fire, Damage, Burst Fire Attachment Upgrades: Reload Time, Stability, Extended Clip Available at level: 1 |
Tactical Pistol
A modern pistol with a quick and responsive rate of fire, but not much stopping power.
Projectile Upgrades: Rapid Fire, Burst Fire and Damage Attachments Upgrades: Stability, Extended Clip and Reload Time Available at level: 3 |
Survivors - Explosives
|
Dynamite
A pack of dynamite with remote detonator. Can be detonated by pressing [M Mouse] after it's been placed.
Available at level: 37 |
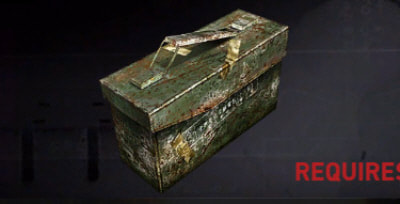
Fake Ammo Box
A rigged ammo box that will explode when unsuspecting victims come within range.
Available at level: 11 |

Flare Gun
Flare illuminate their surroundings, revealing any survivors in the area of effect. Doubles as an effective incendiary weapon.
Available at level: 50 |

Flash Grenade
Flash grenades generate a bright light and deafening sound to daze and confuse anyone in the blast area.
Available at level: 26 |

Napalm Grenade
Napalm grenades explode on impact, dousing the area in flames; an effective tool for area denial.
Available at level: 1 |
DLC Weapons
Lara Croft was able to use a couple of weapons belonging to Agent 47 in the Hitman franchise, however if you're looking to purchase these items now, they are no longer available due to the Hitman franchise changing publishers, and the content was removed from stores.

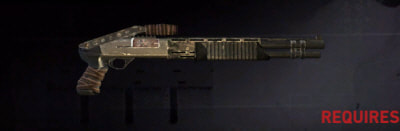
Agency SPS 12
This devastating semi-automatic shotgun is perfect for eliminating targets at close range.
Projectile Upgrades: Rapid Fire, Frag Rounds, Damage Attachment Upgrades: Narrow Choke, Extended Clip, Reload Time Available at level: 1 Weapon Type: Primary Loadout For: Survivors, Solarii |

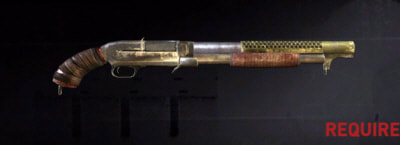
M590 12GA
A classic pump-action shotgun, reliable and deadly in close quarter combat.
Projectile Upgrades: Rapid Fire, Frag Rounds, Damage Attachment Upgrades: Narrow Choke, Extended Clip, Reload Time Available at level: 1 Weapon Type: Primary Loadout For: Survivors, Solarii |
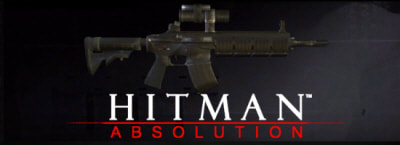
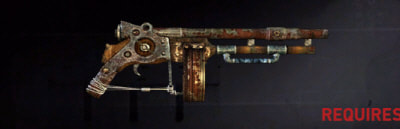
HX AP-15
A versatile assault rifle, with high rate of fire and decent accuracy and damage.
Projectile Upgrades: Rapid Fire, Damage, Stability Attachment Upgrades: Enhanced Zoom, Extended Clip, Reload Time Available at level: 1 Weapon Type: Primary Loadout For: Survivors, Solarii |
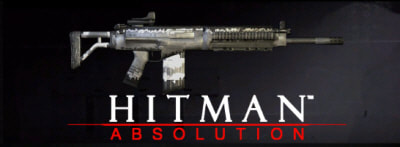
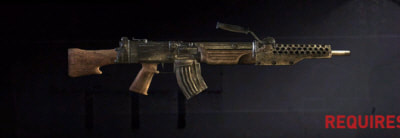
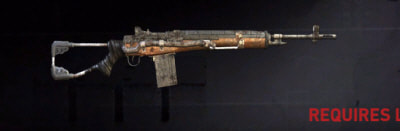
STG 58 Elite
A compact assault rifle with good rate of fire and great range.
Projectile Upgrades: Rapid Fire, Damage, Stability Attachment Upgrades: Enhanced Zoom, Extended Clip, Reload Time Available at level: 1 Weapon Type: Primary Loadout For: Survivors, Solarii |

Silverballer
A pistol with high damage, it is the preferred weapon of a professional hitman.
Projectile Upgrades: Rapid Fire, Damage, Burst Fire Attachment Upgrades: Stability, Extended Clip, Reload Time Available at level: 1 Weapon Type: Secondary Loadout For: Survivors, Solarii |

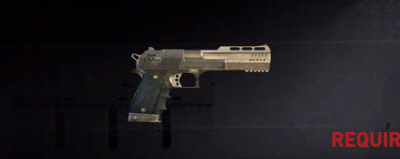
JAGD P22G
A modern pistol with high accuracy, this weapon is a perfect choice for professionals.
Projectile Upgrades: Rapid Fire, Damage, Burst Fire Attachment Upgrades: Stability, Extended Clip, Reload Time Available at level: 1 Weapon Type: Secondary Loadout For: Survivors, Solarii |
Offensive Skills
Accomplished Killer
Increases the experience gained from killing enemies.
Available at level: 1 |

Eagle Eye
Greatly increases the default passive detection range of enemies on screen.
Available at level: 16 |
Harder Hits
Increases melee attack damage.
Available at level: 8 |

Increased Ammo Capacity
Increases the amount of ammo carried.
Available at level: 2 |

Rancor
See the name of your last killer from further away, so long as they remain in line of sight.
Available at level: 21 |

Second Wind
Reduces the recovery time between sprints and allows you to sprint longer.
Available at level: 27 |

Speedloader
Increases reload speed for the crossbow, and all firearms.
Available at level: 35 |
Spite
Upon death your corpse becomes an explosive trap.
Available at level: 10 |
Steady Shot
Increases stability duration with drawn bows, and accuracy with all other weapons.
Available at level: 43 |
Survival Skills
Advanced Looting
Increases the amount of ammo and salvage recovered from player kills and crates.
Available at level: 1 |

Bulletproof
Reduces the damage taken from bullets.
Available at level: 14 |

Fireproof
Greatly reduces the damage taken from fire.
Available at level: 18 |
Grenadier
Greatly reduces the damage taken from explosives.
Available at level: 12 |

Lightfoot
Stepping on traps or landmines will not automatically trigger them.
Available at level: 31 |
PinCushion
Reduce the damage taken from arrows.
Available at level: 6 |

Rejuvenation
Reduces the health recovery delay after taking damage, and speeds overall healing.
Available at level: 39 |

Thick Skin
Reduce damage taken from shotgun pellets, but useless against bullets.
Available at level: 4 |
|
Tracker
Allows you to detect all enemy traps in your line of sight, disarm them, and steal those matching your loadout.
Available at level: 24 |
Feats and Challenges:
Multiplayer came with its own set of challenges and benefits for completing certain conditions. These conditions were called 'Prowess', 'Trials' and 'Adaptations'.
Prowess
|
FEATS
|
SETBACKS
|
Trials
|
FEATS
|
Adaptations
|
FEATS
|
SETBACKS
|